
Just in case anyone was wondering how to make the bunting, some quick instructions.
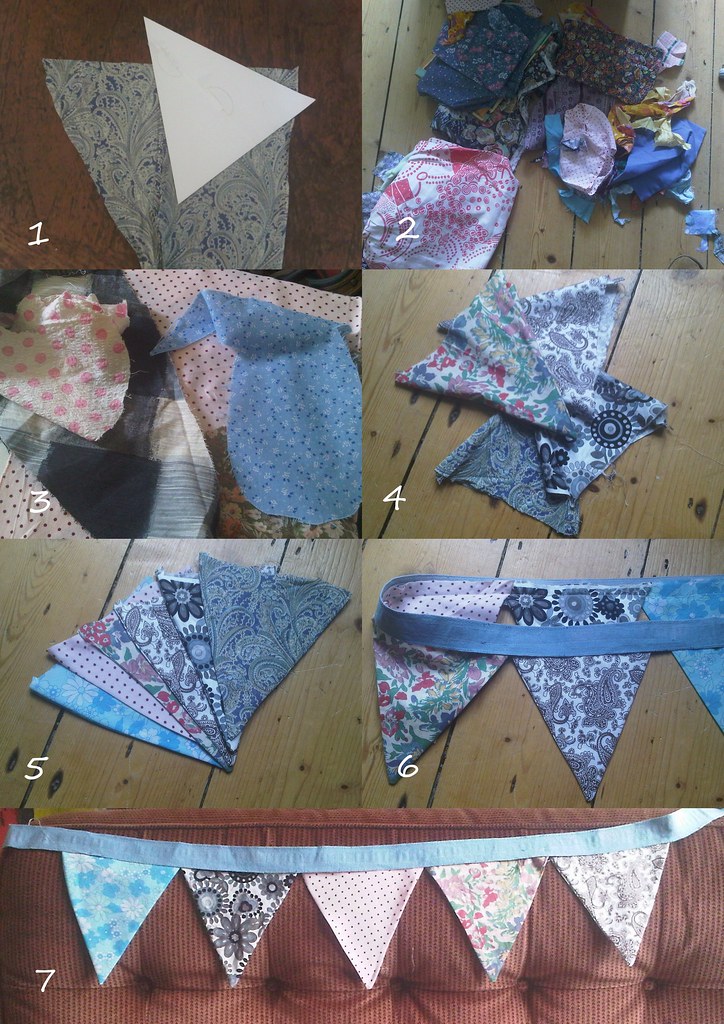
Collate material from various sources {photo 2} and iron flat {photo 3}. Lay out fabric on a flat surface and make a pennant shaped cardboard template (I used a box I found in the recycling bin). You need 2 triangles per flag so work out how best to utilise the fabric. I sewed some of the smaller pieces together to optimise the size of some of the fabrics (do this by placing the pieces outsides together and sewing a seam of about 1cm, then open out the fabric and iron the seam out so it is flat).
Each triangle is then sewed together with the outsides together, starting at one end of the base, down to the point, placing the needle in the fabric and lifting the sewing machine foot, rotating the fabric and then placing the foot back down and continuing the seam. I then trimmed off the excess fabric and turned the triangle pocket right side out, using a closed pair of scissors to poke the point of the triangle {photo 4}.
Each pocket was then ironed flat {photo 5} and pinned along a length of tape. I then sewed one line of stitches to attach the flags to the tape (mine was slightly crooked but I considered that no-one will see it and I have better uses of time than unpicking and re-stitching). I will then add a second layer of stitches to make sure that the flags are well attached {photo 6}.
Then repeat, repeat, repeat until you have enough for your desired venue and hang.
3 comments:
I tried to get Rob on board with bunting, he said it looked like something from a school carnival :(
Oh well, twinkle lights are good too I suppose.
These look fantastic!
What sort of size are they?
Nice Rings collections. Really I liked your post.
Post a Comment